First Steps
Please navigate to:
- Telephony Settings
- Choose your PBX from under the Phone System Installs heading
- Click on the Queues tab
Select Add SIP Queue
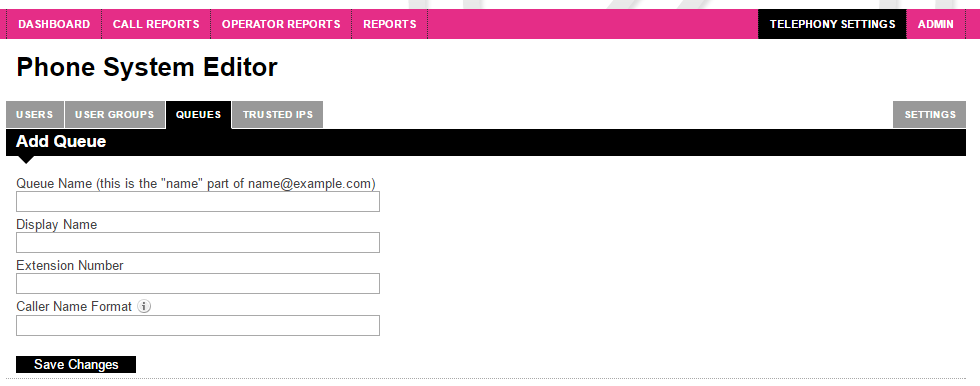
- Queue Name: This will become the first part of the SIP address and must be lowercase. E.g. sales.queue
- Display Name: A visual identifier for the queue
- Extension Number: Choose a unique 4-digit reference number
- Caller Name Format: You can free type here what you would like to be pushed over Caller ID to the handset of your PBX users. Alternatively, hover over the tooltip (i) to see options available. For example, entering {displayName}, which is case sensitive, would pull in whatever you have entered into the Display Name field, and display this to your PBX users instead of the Caller ID. If you choose not to fill this field in, or enter {srcPhoneNumber} into this field, then the standard Caller ID of the caller will display to your PBX users when their handsets ring.
Don't forget to Save Changes
Adding Groups to a Queue
- Click on the queue to expand the options

- Click on Add Queue Member
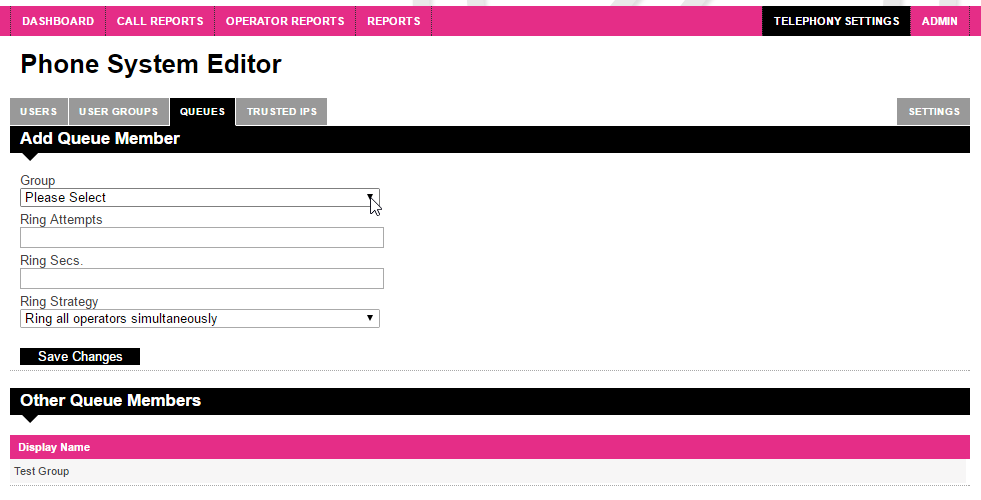
- Group: Choose a group to include in the queue from the drop-down menu. If there are no ring groups to select, check that you have completed all the steps for creating your ring group (setup guide here)
- Ring Attempts: Choose how many cycles of ring time the group will experience in the queue
- Ring Secs: Choose the period of ring time, in seconds, for each ring attempt
- Ring Strategy: Choose how users within this group should be called. This is explained in more detail below.
Ring Strategies
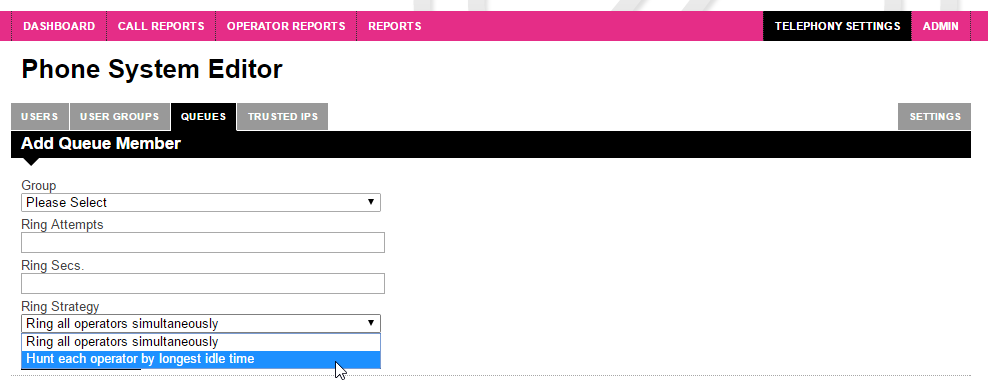
Should you wish to alter the strategy in which your users are called, the Ring Strategy field has two options to choose from. These are;
Ring all operators simultaneously
This option will ring all users within the group at the same time. Any operators set to do not disturb will be suppressed automatically. This is the default option.
Hunt each operator by idle time
This option - also know as Hunt Mode - will ring through each operator based on the idle time since their last successfully connected inbound call or last attempted outbound call. Beginning with the user with the highest idle time, the system will progressively ring each operator until they answer the call. Any operators set to do not disturb will be suppressed automatically.
This progressive hunting is conducted once per ring attempt. Therefore, if you configure your queue member's Ring Strategy to "Hunt each operator by idle time" with two ring attempts, the system will conduct two full hunt cycles on the operator list of your user group. We recommend leaving ring attempts set at a single iteration.
We also recommend that your ring duration is directly proportionate to the number of operators in your user group, as a long duration with many operators will ultimately result in longer queue duration and drop-off.
Perfecting your Queue
- Continue to add more groups to your queue until you are satisfied. It's fine for a queue to contain just one group
- You can edit the ring attempts and cycle durations by clicking Edit next to the relevant group, or you or Delete a group from a queue
- You can re-order the groups in a queue to determine the sequence in which the groups will be rung. To do this, click on the group within the expanded queue view and drag it into position. The ordering is from highest to lowest; the top positioned group in the queue will be rung first.
Please navigate to:
- Telephony Settings
- Choose your PBX from under the Phone System Installs heading
- Click on the Queues tab
You will see a list of your queues listed in black headings. Next to the queue name you can locate it's SIP address.
Simply free-type or copy and paste the relevant queue's SIP address into the destination field of a fixed number, or into the default destination field of a tracking pool (Dial In Group) so that all numbers within it will have their calls directed to the queue, as long as the numbers' destination is set to 'default'.
Whenever updating destinations for numbers, we strongly recommend allowing a couple of minutes for the settings to sync, before making a test call to ensure the call is routing to your satisfaction.


